Tutorial 4 of 7
Collision checking and cell layout
Intermediate 10 min
Add obstacles and work objects, find collisions along the whole path and fix them by moving waypoints or obstacles.
Obstacles
Use the palette buttons to add a box, sphere or column (capsule). Select it to edit its centre, size, rotation, colour and the frame it is placed in. With the move gizmo active, dragging the arrows moves the selected obstacle; the whole drag is one undo step.
Robot links are modelled as capsules and boxes. Kinetica checks:
- every moving link against every active obstacle,
- every pair of non-adjacent links against each other (self-collision); pairs that already touch in the robot's home pose are ignored, like an allowed-collision matrix.
Collisions along the path
After every change the program is checked along the whole path. Collisions appear
- as red links and red obstacles in the 3D view,
- as red marks on the timeline,
- as red sections of the TCP path,
- as time intervals with the colliding pairs in Analysis → Collisions along the path (click an interval to jump there).
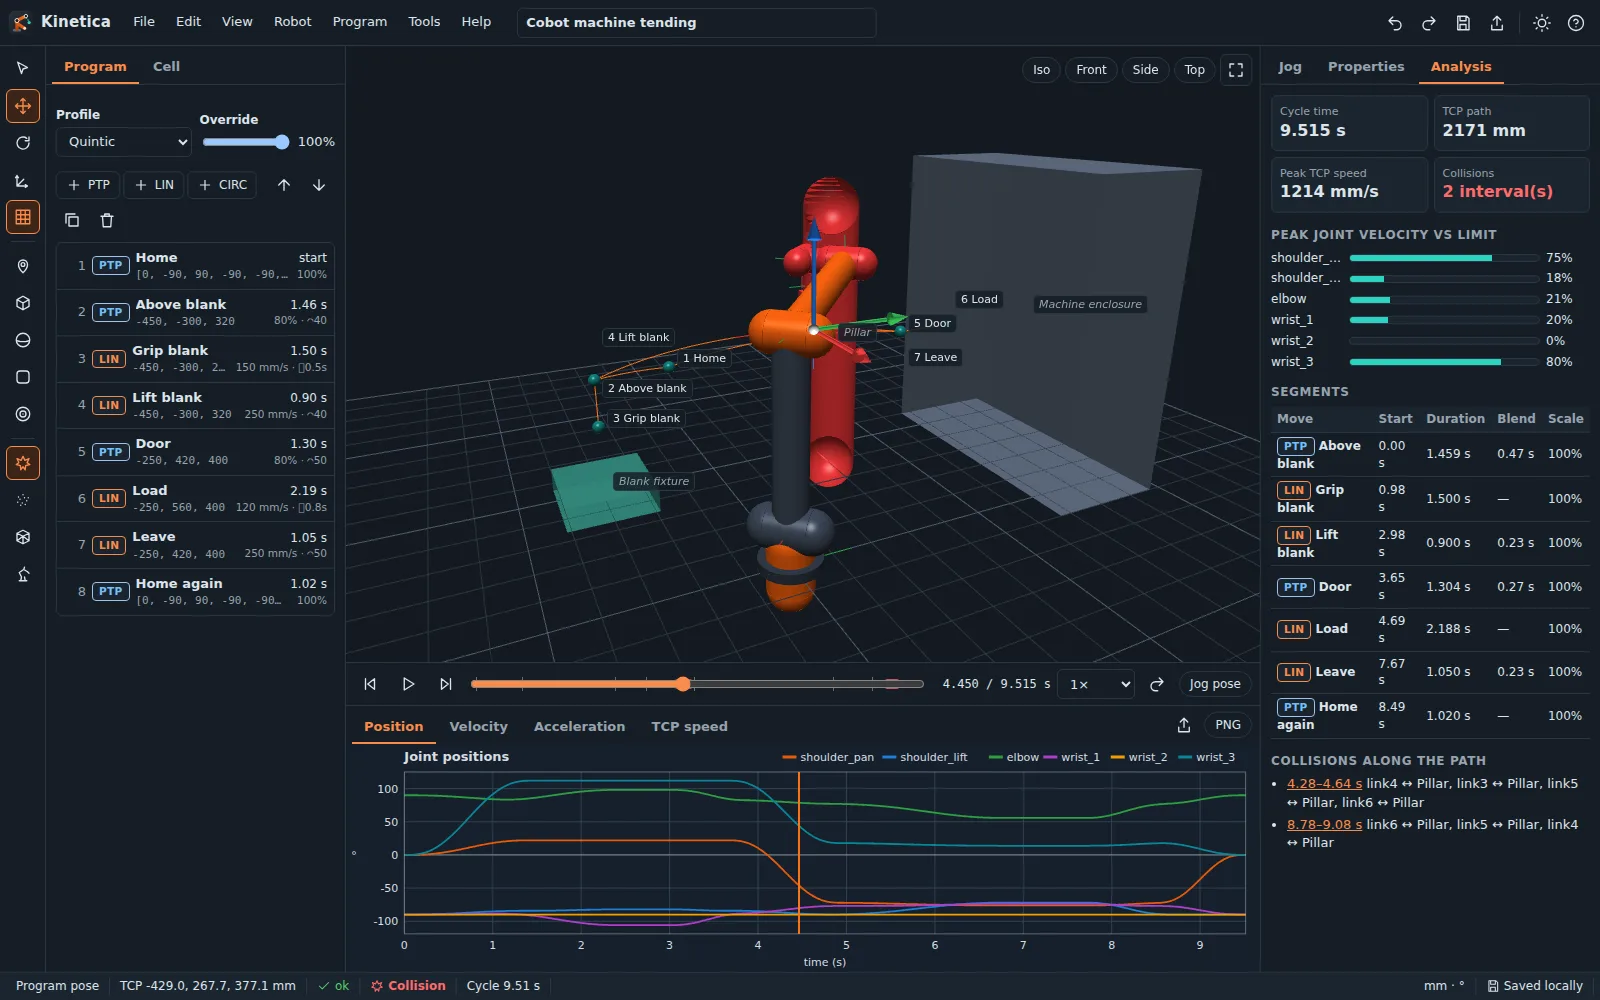
The Collision margin (Settings) adds a safety distance: pairs closer than the margin count as contacts along the path. Tools → Check collisions now reports the current pose with the closest pair and its clearance.
Work objects
A work object is a user frame (origin and rotation). Waypoints and obstacles placed in a work object move with it — handy when a fixture is moved in the cell. In the weld template all seam waypoints are defined in the Fixture frame: select Fixture in the Cell tree, drag it with the gizmo and the whole seam follows.
Fixing a collision
- Click the first collision interval to jump to it.
- Either move the obstacle, or add an intermediate waypoint: jog the robot around the obstacle and press
W. - Watch the Analysis tab: Collisions: none, with the minimum clearance along the path.
Next: [Custom robots: DH tables and URDF](05-custom-robots-dh-and-urdf).